You don’t need the luxurious, eye-catching bathtubs popular in the 1980s to give your bathroom a luxurious feel. All you need is a good idea for the layout of the bathroom. Even if you can’t physically expand the square footage, creative accessories, ingenious color schemes and smart design can give the space a different feel. This is not just luxury. This is a realistic investment.
Adding a second bathroom to a one-bathroom home or renovating the master suite is one of the best home improvement projects. You get value. More importantly, you get sanity. A new bath relieves the morning rush. It ends squabbles over who gets to the bathroom first is now over. Renovations increase comfort and makes coming home feel like coming home. Even simple updates, such as new fixtures and safety measures, can bring refresh your mood daily. Start by asking yourself what really makes your everyday life better.
Why bathroom layout is more important than you think
Personalizing your space requires more than just choosing a paint color. You have to understand how the room works. How does water flow? Where does the light hit? The bathroom is a machine for maintaining hygiene. It needs to work efficiently. An awkward layout can make your daily tasks a hassle. A good floor plan makes the space feel larger and quieter.
Whether you are building from scratch or dismantling old tiles, the methods vary. New construction brings freedom. You can place the pipe exactly where you want. Renovation is a puzzle. Often there are stuck with existing plumbing lines that dictate where the toilet or shower needs to be installed. Understanding this limitation is the first step. When you start over, you have a blank canvas. When you renovate, you face challenges. Both require careful planning.
How to design a bathroom on a budget
Money talks. If you care about your wallet, you need a checklist. Categorize everything into three buckets: must-haves, nice-to-haves, and forget-it.
- Nice-to-haves: A functioning toilet, shower or bathtub, sink and adequate lighting.
- Nice-to-haves: A double vanity, underfloor heating, a soaking tub, smart mirrors.
- Forget it: Opt for luxury fixtures if you can’t afford the installation, or custom tile if you have them in stock.
Prioritize function over flash. Luxury tiles look great, but the materials and labor are expensive. Stock fixtures can look modern if you pick clean lines. Don’t let trends fool you. Make sure you have what you need. If you can afford a luxury item, make it your focal point. Everything else should give way.
Hire a professional or do it yourself?
The biggest cost of the renovation is labor. people get burned. You need to know how to talk to contractors. Be specific. Explain your expectations in writing. Vague explanations lead to vague results. If you decide to do this yourself, know your limitations.
“Hiring labor is probably the most costly part of the renovation. Learn to negotiate the price and explain your expectations.”
If you hire out, get multiple bids. Check the references. Make sure the other person understands the layout you want. A bad contractor can ruin a good plan. If you do it yourself, read about safety. Electricity and water don’t mix well. Proper ventilation cannot be ignored. Mold is a silent killer.
Plan the renovation before removing the tiles
Jumping in without a plan is a mistake. Plan the entire project. Measure everything. Twice. Check the pipe stack. Is it in the right place in the new layout? If not, moving it costs money. Consider this early.
Decide on your style. Do you want to a spa feel? A minimalist look? Cozy cottage atmosphere? The style determines the material. Wood looks warm, it rots when exposed to moisture. The stone is strong, but cold. Glass adds light, but also shows every speck of soap scum. Choose the material that suits your lifestyle. If you hate cleaning, avoid open shelving. If you like plants, choose a bright, humid space.
Layouts for weird spaces
Not all bathrooms are perfectly rectangular. Some are narrow condos. Some are annexes built from closets. These spaces require smart thinking.
- Narrow baths: Use vertical storage. Place the vanity along the long wall. Keep the floor clear.
- Small spaces: Use mirrors to double the visual space. reflected light. Dark colors are absorbed.
- Irregular Shapes: Custom cabinets can fill awkward corners. Don’t leave gaps. It collects dust.
The purpose is traffic. You must be able to move from the shower to the toilet to the sink without bumping into objects. If the door opens inwards, it takes up valuable floor space. If possible, consider sliding or opening doors.
Lighting and ventilation: unsung heroes
No bathroom is complete without light and air. The windows are great. However, adding windows is not always possible. Artificial light should mimic sunlight. Place the lamp on the mirror. Shadows under the eyes can make shaving and applying make-up difficult. Use layered lighting. General purpose ambient light. Work lighting for specific jobs.
Ventilation is very important. Moisture can cause mold growth. Install a fan that moves enough air. A good rule of thumb is to change the air once an hour. If you take a hot bath for a long time, you will need a larger amount. Check the channels. It should lead outside, not the attic. Trapped moisture can damage drywall and insulation.
Decorate with colors and textures
Color can be deceiving. Light colors make the room feel bigger. Dark colors make people feel more comfortable. Use textures to add depth. The contrast between the rugged stone walls and smooth porcelain creates an interesting atmosphere. The lines on the floor guide the eye. Using elongated tiles can make a small room feel longer.
Balance is the key. Choose a focus. Maybe a bathtub. Maybe it’s a mirror. Let this feature shine. The other elements should support it, not compete with it. Avoid cluttering the space. A clean bathroom makes people feel cleaner and more relaxed.
Which style suits your lifestyle?
The master bathroom needs privacy and luxury. Home bathrooms should be durable and easy to clean. Bathing children should be fun and safe. Special bathrooms, such as toilets, are on display. It sets the tone for your home. The guest bathroom is designed with functionality in mind. It must be fast and easy to use.
Think about who will use the space. If it’s just you, choose personalization. If it’s for home use, focus on practicality. There are no wrong answers. Just do what applies to your daily life.
Where do we go from here?
The layout is ready. We have a budget. You have style. Next we need details. The next step is decorating. How do you tie them together? What accessories make it unique?
“To find your style, keep reading. In the next article, we’ll show you how to decorate your favorite bathroom
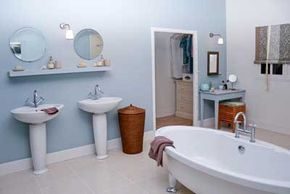
Stop guessing and start designing your bathroom
The size and layout of your master bathroom is not just about aesthetics. They define the functionality of the space. The designs you see in magazines are starting points. They are suggestions. In reality, it’s measuring walls, inspecting stacks of pipes, and deciding whether you want a spa-like escape or an efficient, functional space.
Before ordering tiles, familiarize yourself with your current bathroom.
What annoys you? What works?
If you have a shared master bathroom, does the floor plan allow two people to get ready without bumping into each other? Is there enough space on the counter to store makeup and toothbrushes? Or is storage a real bottleneck that leaves you scrambling through messy boxes every morning?
Maybe the color scheme is getting boring. Maybe your home has been the same beige color since you bought it and you’re ready for a color change.
Decide what you are willing to compromise on.
Some homeowners may want to do a thorough repair. Others just want to install a hot tub where their old standard hot tub was. This makes a huge difference in cost and effort. A complete renovation includes demolition, new plumbing, electrical work and finishes. A fixture swap is much simpler.
Discuss this with your family. Sit down and be specific.
Even small children can offer surprising insights into the stress and pleasure of going to the toilet.
If you include everyone, they are more likely to respect the outcome. Teenagers may think they need more storage space for their electronic devices. Your partner may require a double vanity to improve morning flow.
Listen to these needs.
The goal is to solve problems, not just make things beautiful. Find the problem. Then create a plan to address those issues head-on.
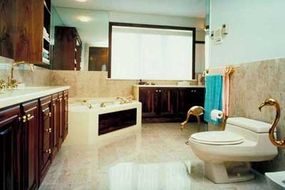
You know what you want. Now let’s find out how to get it.
Read home design books in depth. Browse magazines. Bookmark the pages that caught your attention. Copy images of your favorite bathroom designs and products. You’ll build your visual vocabulary before you spend a cent.
Create a scrapbook.
Full of ideas. Photos. Product catalogs. This document serves as a cheat sheet for professionals. It shows them your preferences. It highlights your needs. You can also get inspiration from websites. Visit your local bathroom design center. Walk through the department at your nearby home improvement store. Just look. See what sticks.
Most homeowners skip this step. They walk into a showroom empty-handed. Don’t be that person.
Unless you’re painting a wall or replacing a mirror, you need a plan. Contact a bathroom design expert. You need to be clear about what you want. And what you absolutely refuse to have.
Prepare for the interview.
They ask questions. A lot. Be prepared to explain your family’s lifestyle. How are you going to use this space? Do you shower in the morning? Need a double vanity? Do you have kids who splash? Do you have a medical condition that requires a walk-in tub?
Use that scrapbook to guide the conversation. Show, don’t just tell. Style is subjective. You might think “traditional” means crisp white subway tiles and brass fixtures. Your designer might think it means dark wood and clawfoot tubs. Make it clear early.
The more homework you do, the better the outcome.
Contact a bath specialist. Discuss your needs. Keep an open mind. Depending on your answer, they may suggest something you haven’t thought of. Shampoo niche. A bench for shaving. Heated floors. It might seem odd at first. It could be the perfect solution for your home.
If you are building new, the rules change.
Designing your bathroom from the start gives you flexibility. Choose a layout. You place the plumbing. Renovating an existing space means working around constraints. Pipes are already there. The walls can be load-bearing. The approaches are very different.
The difference between new construction and renovation
The new structure allows for custom plumbing stacks. You can move the toilet wherever you want. Renovations often require fixtures near existing lines. This saves money. Design options are limited.
Consider structural possibilities.
In your new home, you can frame a wall to create a private water closet. When renovating, you might be stuck with an open floor plan. Consider ventilation. Newer buildings have room for larger fans. Older homes may have struggle with ductwork.
Plan for the long term.
If you are remodeling, inquire about access. Can I access the water shutoff valve behind the bathroom sink? For new construction, transparent, easily accessible panels can be installed during installation. If you are renovating, you may need to cut into finished walls later.
Make your decision based on your budget and flexibility.
Remodeling costs are typically higher per square foot. You are paying to remove old materials and fix unexpected issues. Construction costs for new construction are predictable. However, this requires more advance planning.
Which route makes sense for you?
If you stay where you are, you can work with what you have. If you’re building new, dictate the flow. Both require the same preparation
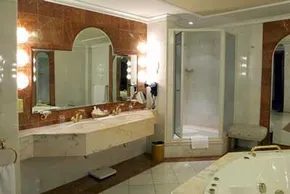
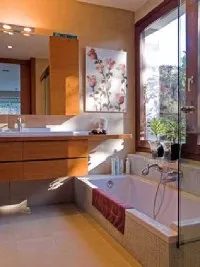
The choice of tiles is not the only thing that determines the appearance of your bathroom. It’s about structural reality. Here we discuss five main categories of bathroom design and construction. The correct path depends entirely on whether you are starting from dirt or modifying an existing wall.
Let’s start from scratch
New construction affects the most. If you are making it from scratch, dictate the size. You choose the place. Specify the configuration.
Place the master bath in the master suite. This is no longer a luxury, but a standard of privacy. Place a secondary bathroom near the kids’ bedrooms for nighttime use. Do you need a powder room? Place it near the dining room or family room. Guests enjoy not having to walk through private living spaces.
Think bigger. Want a walk-in shower for your home office or bonus room above the garage? Or perhaps the entertainment area downstairs? You can have it all.
Of course, your budget and the area of your site will limit the total square footage. However, there is flexibility within these limits. Trade off square feet between the bathroom and the living room. The amount you spend on plumbing rough-in is more predictable than the amount you would spend on an old home. You don’t have to fight against decades of bad decisions.
Shifting the Footprint
Remodeling is different. This is not a cosmetic facelift. It involves big changes. It may be necessary to shift the entire footprint of the room.
This means more space. Or change the layout to improve accessibility. This rarely means simply swapping a vanity with a new one. It means moving supplies. waterline movement. After this, the drain and waste outlet. This is the hardest part.
Maybe move the door. Maybe cut out the windows. It can even cannibalize space in a nearby closet or small bedroom. There are restrictions in the existing homes. Bearing walls do not care about your design dreams.
However, don’t let these limitations fool you. You can make surprisingly radical changes. The renovation does not depend on how the old bathroom looked. It depends on what you need. And as long as your budget allows.
If you have several bathrooms that need updating, plan them as one project. Create a luxurious private retreat for you and your spouse. Add a spacious guest bathroom in the hall.
If you love your property and neighborhood, you’ll love your bathroom after it’s been renovated.
The goal is to align your current reality with actual lifestyle. Not your Instagram feed. your real life.
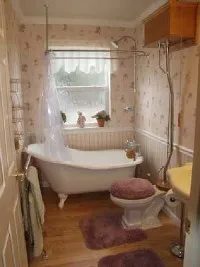
Decoration
Renovation means dismantling the floor plan. Let’s say you’re considering a complete redesign. It makes sense if your home has strong structural bones. If you like the overall style but hate the tightness, this is for you.
Historic homes require special attention. There may be a legal obligation to maintain the current style and structure. Respect the update.
Bathrooms evolve faster than bedrooms. The challenge is to balance the past with modern comfort. You want a workable space that suits a modern lifestyle.
Older homes often have too many small bedrooms and too little bathroom space. You can also solve the space problem by combining one small room. You can also find vintage-style fixtures that look old but work like new. It’s a way to keep the nostalgic charm without sacrificing functionality.
Exchange
Replacement, or a “changeout” is easier. Remove the old unit and place the new unit in the exact same location.
In a typical bathroom, Fixtures takes up most of the space. Replacing outdated parts with modern ones can make a big difference in appearance and functionality.
This is an update. But that doesn’t solve the big problem. If you don’t have enough floor space, insufficient storage, or an inconvenient location, changing it won’t help.
Be careful around surfaces. New fixtures may look different than old ones. You may need to repair wallpaper, tiles, floors or moldings. This is why many associate replacement with redecorating.
Permits are less likely for simple replacements. Usually, an expert handyman can do the job.
Complexity varies widely. Changing a wall-mounted toilet is easy and clean. Replacing a built-in bathtub with a clawfoot model is awkward and difficult. Match the scope of work to the skill level of the worker’s.
You don’t necessarily need new fixtures. You can keep the tiled-in sink or the bathtub intact. Install new faucets, pop-up drains, and attractive light fixtures. These small changes can provide a high return on investment.
Redecoration
We renovate without demolition. It’s cheaper and easier than remodeling.
Costs may vary. This can cost much less than replacing fixtures, but go all out can cost just as much. If the layout works for you, but your style feels dated, this is for you.
A good example is the Designer showhouses. These changes are often presented at events organized by charities. Designers rarely buy new fixtures or resurface walls. They splurge on in creative wallpapers. Consider an faux-refinish paints. They buy exciting shower curtains, towels and curtains.
You can refresh a tired surface yourself. Hardware stores sell products for repainting tiled walls and vanity tops. You can refinish your knotty pine sink cabinet. bathtub refinishing kits similar to nail polish are also available.
Preparation is everything. The Surface prep must be done carefully. Done right, these treatments are an economical way to refresh a room quickly.
Keep your expectations realistic. Align them with your budget and scope of work. Veteran homeowners agree on one thing. even the ultimate bath is only a small part of life. Keep things in perspective.
You may not be able to spend endless money on your bathroom. In the next section, we will discuss bathroom design on a budget.
For more information on decorating and remodeling a bathroom, visit:
-
Decorating a Bathroom
-
Kids Bathroom Decorating Ideas
-
Home Decorating Tips
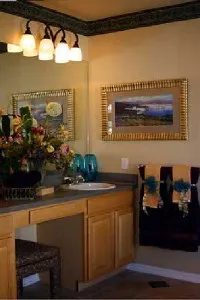
Bathrooms are probably the most expensive room to renovate per square foot. You are dealing with plumbing, electrical, carpentry, tiling, etc. in a small space. The price of skilled labor can rise quickly. Materials can also increase costs.
Experts and experienced homeowners agree on one thing: plan ahead. If you rush into the showroom without a plan, you might end up going over budget. All decisions should reflect real needs, not just what looks good in the magazine.
First, list all the features you need. Then divide that list into two categories.
Essentials and extras
Category A: What you really need.
Category B: Something you want but don’t have yet.
First buy class A. These costs will be finalized. Now look at category B. If your budget is tight, you can skip category B products. If you tackle the “must haves” too soon, you’ll end up cutting what you need later.
Predict what can and cannot be added later. Structural changes are difficult to correct. A typical example is installing the blocking for grab bars before laying the tiles. You may not need these bars now, but adding them later means breaking tile. Want to add a towel ring? It’s always easy.
First determine the floor plan and structural requirements behind the walls. Later, you can replace your faux-marble laminate countertop with real marble. A sink in the wrong place cannot be easily moved.
Breakdown of Bathroom Renovation Costs
Most of the costs fall under the scope of the proposal “T&M”. This represents time (labor) and materials. You can save money on both.
How to save on labor costs
Construction time is money. Homeowners pay plumbers, electricians and tilers an hourly rate. The biggest savings come when you invest your own time instead of theirs.
Don’t try to work with experts. It slows them down. Do your part before they arrive and after they leave.
DIY Preparation Steps:
– Remove the old wallpaper with steam.
– Pull up the old floorboards.
– Remove old installations.
**Safety first. ** Know where to stop the water line before pulling the device. Locate the wires and pipes before removing the wall. Never remove old insulation that may contain asbestos. Do not remove old paint that may contain lead. If your home is historic, seek professional help first. You don’t want to disturb something important.
Talk to your contractor about your intention to do the job as soon as possible. Write it down. Put it in your contract. Make sure labor costs are deducted from your quote.
Final touches you can make:
– Paint the walls.
– Fasten the clutch plate with screws.
– Replace the shower door glass.
– Pick up the trash.
The money you save on labor costs can be used to pay for the luxury upgrades you really want.
Smart material options
You might not be able to afford a marble vanity, imported furniture, hand-painted tile, and custom cherry wood cabinets all at once. Choose one or two features that are most important to you. Look for other smart options.
Equipment and supplies
You can’t turn a regular bathtub into a whirlpool, and you can’t make a gravity toilet work like a pressure-assisted model. But you can copy this look. Traditional lamps are available in several price ranges. Explore our styles with high-end models and find affordable versions of similar sets. Modern innovations such as the one-piece elongated bowl are difficult to copy on the cheap. If you want these special modern designs, look elsewhere.
Hairdressing table top
Marble tiles are of the highest quality, but large and perfect marble tiles are hard to find and therefore expensive.
- Large Marble Tiles: Install side by side to get the same look for less.
- Artificial marble: Marble powder combined into a solid tile. A good middle ground.
- Laminate: Synthetic marble pattern is the cheapest option.
Wall tiles
Custom, handmade and imported tiles are expensive. Use it as a “bath charm”. Attach only to borders and accents. Compatible plain tiles are used in most areas of the wall. Save custom parts for eye-level areas like backs and window surrounds.
Floor
Marble floors are often hard to find.
- Tiles: Look for cultured marble options. Affordable and durable.
- Vinyl floor: High-quality vinyl is beautiful and cost-effective.
Custom cabinet
Storage lockers come in different sizes and shapes. They usually fit well and look custom. Use inventory whenever possible.
If your budget is pine or oak, but your heart longs for cherry or maple, paint your cabinets. The stain highlights the grain of the wood and reveals the type of wood. If you draw a picture, it will be hidden.
Update your hardware. Replace the standard knob with a new pull handle. Think pewter, whitewashed brass or painted ceramics. Create a custom feel without setting a custom price.
The faux finish is attractive. You want to add a hand-painted garden landscape or a sophisticated marble effect to your bathroom walls. Hiring a professional to create a trompe l’oeil can cost a lot of money. There are many options for DIY enthusiasts. Look for stencil kits at craft stores. Faux finish kits are widely available at hobby stores. You can also look at the portfolios of students at local art schools to see what inexpensive paints can be used for. Wall coverings are another option. Mimic expensive textures at a fraction of the cost.
Here are the hard truths about home renovation. You can usually find a look that fits your budget. If you’re stuck, spend on function. Keep your style simple.
Resale value planning
Your bathroom should reflect your taste. However, you should also consider the date you want to put your home on the market. Bathrooms that satisfy consumers increase sales. A bathtub that is too customized can negatively affect sales. It is very unique. Buyers want to move in, not rebrand.
Smart upgrades bring big returns. You can get back 70-90 percent of your investment. This will help you achieve your asking price. Here’s how to protect value.
- Focus on performance. Better fixtures and windows increase sales power. Regular ceramic tiles are more durable than laminate at the same price. A simple porcelain sink has a timeless appeal that beats cultured marble.
- **Respect the local price range. ** Don’t spend too much. Experts say that renovations should be limited to 10 percent of the home’s value. If there is a palace in a cottage, the whole house looks strange. If you need more space, add a half bathroom instead of renovating a room.
- Avoid trendy flooring and counters. Think carefully before choosing bold patterns. Fashion statements become outdated quickly. You don’t want to turn off buyers after three years.
- ** Keep fixtures simple. ** Skip the curlicues. If you’re tired of chrome, try brushed pewter or chrome-and-brass blends. Avoid complicated designs that are difficult to clean or look outdated.
–Choose a neutral color. Neutral colors best hide wear. Light neutral colors make small spaces feel larger. Dark colors, such as black or chocolate, hide dirt, but soap scum and stubborn water stains are clearly visible. - Add color with accessories. Do you like bright patterns? Use them on towels, rugs, soap dishes, wallpaper, etc. You can easily change the paint and borders later. The Wine green against bone is not at all similar to the peach against bone. These accessories allow you to be adventurous without compromising on resale value.
What If You’re Not Moving?
Maybe it won’t sell. Maybe you have small children or grandchildren. Maybe you’re planning on aging in place. In this case, focus on universal design. It’s not just a wheelchair ramp issue. It’s about creating spaces that work for everyone now and in the future.
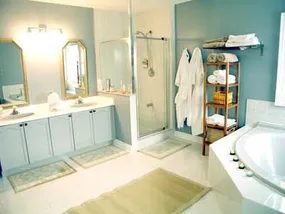
Universal design is more than just a buzzword. This is the reality of an aging population and all generations living under the same roof.
Think about your daily struggles. A 36 inch aisle becomes 40 inches. An extra 4 inches prevents the wheelchair from getting stuck. It gives a walker more breathing room. There is no need to start a big renovation. Contrast is cheap. This works well. Use contrasting border tiles on the counter. The sharp visual line helps those with low vision to see where the surface ends and the floor begins.
Water temperature is also a silent danger. Standard faucets can cause burns. Switch to no-scald valves. Wing handles are better than round knobs. No need to twist your stiff wrist. For people with limited mobility, this small change can remove obstacles.
Allergies are also important. If your home is sensitive, look for hypoallergenic finishes. Specify glues that don’t off-gas. It’s not just a matter of style. It’s about health.
Consider your layout. If you have a laundry room on the first floor, consider redecorating it. Let’s take a full body bath. Please do it now. Waiting for a crisis to break out is a bad strategy.
Let’s go shopping
Hiring experts is expensive. That’s why you need to shop around first.
Don’t hand over checks blindly. Browse the web. Visit the bath center at your local home improvement store. Read interior design magazines. You need to see what’s out there. You need to understand the price tag.
Most people haven’t bought light fixtures in years. The price has changed. Styles have changed. If you go in blind, you’ll get sticker shock. You’ll argue with your contractor over costs. You end up with something you don’t like.
Educate yourself before you book the crew. Know your budget. Know your materials. When you attend a meeting with a renovator, you are not a victim. You are a ready buyer. This changes the power dynamic. You can build better relationships. You can get exactly what you want.
“You can avoid price shocks by being knowledgeable in advance.”
Hiring someone to remodel your bathroom is one of the most expensive projects you will face. Every decision is important. In the next section, we’ll discuss how to hire a professional without getting scammed.
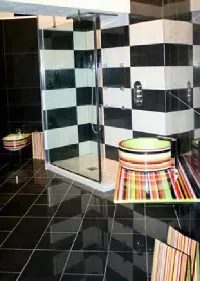
Find out about the costs and safety of a professional bathroom renovation
State-of-the-art fixtures is useless if the layout fails. Water and electricity do not go together. Mistakes can be costly. It can even be fatal. You cannot tamper with waste stacks or load-bearing walls. Be especially careful when choosing a bathroom designer and installer.
Why code compliance is more important than style
Even if you replace an old faucet with a new one in the same place, the installer must know the building regulations. They need to understand plumbing. Wiring is also important. Structural integrity is non-negotiable.
If you skip permits, you will be strictly checked. The inspector may force you to remove the plasterboard. Wires and pipes should be checked. If a violation is detected, you pay for the rework. If someone is injured later because of non-code work, you may be held liable.
Let’s protect ourselves. The contract must state in whose name the professional is applies for permits. Contractors are responsible for compliance with the code. If you’re DIY, you’ll also need to apply for a permit. You will still meet code. You must cooperate with the inspection. These rules exist for your safety.
Choose from architects, designers and retailers
You can choose who builds your new bathroom. Architect. Interior designer. Or a general remodeling contractor.
If this were a full gut renovation, everyone would probably participate. These professionals buy their fixtures wholesale. They charge you retail markup. In addition, additional expert fees are charged for planning and supervision.
Bathroom retailers are another route. Usually these people are kitchen and bathroom experts. They sell from their own showroom. We also install products. An additional fee may be charged for design services. Or it can be included in the price of the product.
Think carefully about “free design services”. If it’s really free, the quality is low. Or the business might not survive. If there are hidden costs in the price of the product, be aware of them in advance.
Independent designers offer more options. They are specialists. They do not run a showroom. Specify products from multiple sources. A fee will be charged. Or a fee plus a markup.
Certificates and payments
Look for the “CBD”. Certified bathroom designer. This means they passed the test. they have experience. They know electrical, plumbing and mechanical systems. They understand construction estimating. Many also hold “CKD” in kitchen design.
Some charge a fee or mark-ups for some products. Some charge only a consultation fee. Most ask for a retainer. This is a percentage of the expected design costs. Ask for it in advance.
Who supervises the work?
Designers can also provide only drawings. They can consult with your tradespeople. Or they can monitor contractors. These contractors supervise subs. Tile setters. Plumber. Electrician.
Can you buy the design and act as your own general contractor? Yes. But it’s hard work.
When you hire a bath dealer, you get the complete package. Design with installation. You may have to pay a flat fee or percentage of the total project.
Independent designers offer a wide range of products. You can pay by the hour or by a flat design fee. They will place the order for you. This is very important when purchasing through the Trade Design Center. Guaranteed to be the right size and style. Invoices can be sent to the designer or directly to you.
Act as your own general contractor
You can also manage the implementation yourself. Don’t skip the study phase. You should know the local building regulations. You need to understand legal terminology. Contracts must require subcontractors to comply with the rules.
You must apply for permits. You must plan for inspections. You need to know the basics of each trade. This is how you know when something goes wrong at work.
be patient. You can protect yourself by following the building code enforcement. It protects you from shoddy work. That way you don’t have to pay for someone else’s mistakes.
Choosing a suitable contractor is not just a bid. Character check. You’re handing over your home to strangers. They see you in sweatpants. They know where you keep your good glasses. Trust is the currency here. Without it, the project dies.
vetting your renovation team
Requires specialized knowledge. It requires honesty. Simple math. But how do you check it?
Check the references. Not the ones they give you. The ones you find yourself. Call previous customers. Ask about the schedule. Ask about budget overruns. Ask if they show up every day.
Insurance is non-negotiable. General liability. If you don’t have workers’ compensation, you can’t use your website. period of time. Get a written certificate of insurance. Make sure it is active. Call the carrier. Don’t trust the 2019 PDF.
Preparation for the demolition phase
Before the sledgehammer swings, you need a plan. Bathroom remodeling is wet. Messy. Disruptive.
Start with the big stuff.
- Clear the space. ** Remove everything. Towels. Rugs. art. Items on shelves. You don’t want your favorite vase to coating.
– Protect the floors. ** If you’re keeping the flooring in the rest of the house, cover it. Heavy duty plastic. duct tape. One dropped tool through cheap plastic is a disaster waiting to happen. - **Turn off utilities. ** Water main. Electrical breaker. Gas line (if there are gas appliances nearby). Test the shut-off. Make sure it actually works.
- Set up a temporary bathroom. If this is your only bathroom, arrange a spare. Or negotiate a schedule with your contractor. You don’t have to take time off from work just because there are no toilets.
safety first
The safety of your family is more important than deadlines.
Keep them away from the work zone. Children. Pets. elderly relatives. Barriers are cheap. Drywall panels work well. Tape them off. Signage helps too.
Dust travels. It goes into the HVAC system. Seal the vents. close the door. If possible, use plastic sheets with zippered openings. You don’t want silica dust in your bedroom.
What’s going on
The first week was noisy. Then it got dirty. When that happens, it becomes chaotic.
Your contractor should guide you through each step. But you have to be present. Log in daily. Please take a look at the work. Does it match your plan? Are the tiles even? Are the pipes straight?
Ask me a question. I have a question. Even if you are stupid. Ignorance is expensive.
Don’t be afraid to say no. If something doesn’t seem right, stop. Fix it now. This is cheaper than repairing the tiles after grouting.
This is not just an aesthetic problem. It’s all about functionality. Water damage is hidden. It burned due to electrical leakage. take it easy
Next steps
Once the presentation is complete and the draft has been reviewed, the real work begins. tube. electric. insulation.
Bring your ear closer to the ground. Listen for voices that don’t belong. dripping water. Buzz. Cracks.
“Contractor commitment is determined by the final project.”
Check everything. Measure twice. Cut it once. But most importantly, check twice. Before the wall was built. in front
Vetting the Pros and Vetting the Paperwork
Choosing the right contractor is based on forensic due diligence rather than intuition. You may love this guy’s smile, but does he have insurance that will cover you if he drops a 50-pound cast-iron tub on your foot?
Start by checking with your state attorney general and your local Better Business Bureau. Look for unresolved complaints. If the red flags are waving, walk away.
When interviewing applicants, ask for proof of insurance. We talk about property damage, liability and workers compensation. Do not accept verbal guarantees. Insist on seeing the actual policies. Write down the policy numbers, expiration date and the specific carrier’s contact info. Call the insurance company directly to make sure the policy is valid before the drill bits start spinning
Contracts and references
Make sure the required building permits are in the contractor’s name, not yours. You don’t want to be liable for code violations.
Ask for a portfolio of actual bathroom projects before signing the contract. It’s not a living room. It’s not a sunroom. Bathroom. Ask the contractor to explain the specific engineering and design issues they addressed in those spaces. It reveals how they deal with the messy and complex reality of plumbing and tiling.
Then, call their references. Ask specific questions about past bathroom customers. Ask about the schedule. Ask about communication. Did the specialist call you back? Did they keep you updated? If the answer is vague, keep looking.
The quote needs to be surgical in its detail. List each product by brand, model, color and size. Outline the payment schedule. Specify start and end dates. Include penalties for nonperformance. a full legal contract might be overkill for a job as small as $1,500, but a detailed written contract is non-negotiable. It’s your money and your home.
Plan for disruption
Renovating your only bathroom is a logistical nightmare compared to adding a secondary bath. Losing access to your sole toilet and shower is brutal. If you are planning to install a second bathroom, consider installing the new bathroom first before removing the old one. This is a strategic step to save your sanity.
If that’s not possible, make a survival plan. Some installers are able to keep one fixture functional, but usually a portable toilet or other place to live in for a few days is needed.
Delays happen. Weather, supply chain issues, or contractors juggling multiple jobs can push your start date back several weeks. Add a month buffer to any timeline. Don’t schedule the renovation to be completed two days before your daughter’s wedding. Murphy’s law is real.
Site protocols and cleaning
Brief your family. Explain the noise, the dust, and the disruption. Get them on board.
ensure the dumpster is placed correctly on your property before the crew arrives. We are finalizing the demolition work we negotiated in advance. Clear the bathroom completely. Place drop cloths in hallways and adjacent rooms. Dust is an intruder. Go to your HVAC system and fix everything.
Confirm with the contractor that they will use plastic sheeting (like curtains) in doorways to contain debris. They should remove all waste to the dumpster every day and “clean” the work area every night.
When the team arrives, show them the original shutoff valve and the location of the shutoff valve. Next, take a step back. Let them work. Check back from time to time, but don’t linger too long. Moving slows you down.
Finally, go through the project step by step with your contractor. Create an incomplete list of missing data or incomplete items. Reputable professionals want to sign and pay you, but they also want five-star reviews to attract their next client.
“Reputable professionals are interested in seeing if you’re willing to accept the job and pay the final fee. After all, they want you to rave about it to their next potential client.”
When the hammer has stopped and the seal has leveled, you will be left with white paper. The hardest part is hiring the right people. Now comes the fun part.
Stop it. I leave the table of contents here.
You can imagine elegant chrome faucets or hexagonal subway tiles. You are ready to click “Buy”. However, please pause for a moment before continuing to install the product. You can hide the sofa. Strange carpets can be replaced. The toilet is permanently installed.
Installed devices cannot be easily disguised.
The mistake most homeowners make is patchwork. They choose the vanity here, the shower head there, and the tiles from a third source. The results appear to be engineered by committee. It lacks consistency. It lacks soul.
Before spending money on materials, you need to understand the structure of the room. The basic layout of the bathroom is important. Pipe installation restrictions determine where the furniture can be placed. Mechanical systems (ventilation, heating, water pressure) determine which systems work and which systems take longer to repair.
“Installed products are difficult to disguise.”
Once you understand the logic of plumbing and mechanics, you can focus on the fun part. Use color. use the line. Use shapes. These are the tools you can use to create a space that is as comfortable as it looks.
But first you need to determine the purpose of the room. The design logic of the Master Lounge is very different from a children’s toilet or a busy family bathroom.
Bathroom design priorities
The public spa is reserved for private use. This is an extension of the bedroom. This is about the sanctuary.
Important notes:
– Privacy: Dark or high windows.
– Premium materials: Stone, wood, soft lighting.
– Features: Double sink, walk-in shower and deep soaking tub.
– Storage: Hidden cupboards, deep drawers.
Tools and materials:
– Slate (marble, granite, quartz)
– a wooden cabinet
– Luxurious lamp (brushed nickel, matt black)
– Soft ambient lighting (wall lights, dimmers)
Home bathroom design priorities
The family bathroom was also badly damaged. everyone uses them. It should be durable and easy to clean.
Important notes:
–Durability: Scratch, dirt and moisture resistant.
– Safety: Non-slip floors and handrails.
– Features: Enough space for several users, good storage space for toiletries.
– Easy to clean: Smooth surface with minimal grout lines.
Tools and materials:
– porcelain or ceramic tiles
– Laminate or solid surface worktops
– Durable paint (satin or semi-gloss)
– Standard jig (chrome, stainless steel)
Key aspects of designing a children’s toilet
Bathing children should be fun and safe. They are also usually confusing.
Important notes:
– Safety: Rounded corners, non-slip surface, temperature-controlled water.
– Fun: Bright colors, playful shapes and attractive installations.
– Features: Easy-to-reach storage space, child-sized accessories (or adjustable fasteners).
– Durable: Made to withstand spills, splashes and rough play.
Tools and materials:
– Vinyl or luxury vinyl plank (LVP) flooring
– Clear, washable paint
– Child safety features (low flow faucet, adjustable shower head)
– Dressing table with round edges
Next steps
What type of bathtub is it?
Master bathroom
Of course, the layout of the master suite depends on the square footage. But the real driving force is who uses it. You need a design that can fit two adults comfortably. This is usually the largest bathroom in the house. It is installed in the bedroom or next to the bedroom.
Consider vanity. Long counters work. Or two separate sinks. You can also place them next to each other. Or facing each other in the middle of the room. Place them opposite each other on opposite walls for a dramatic effect. It breaks up the space.
Luxury features are key here. Deep bathtub. Separate shower room. Maybe it’s a whirlpool. A bidet adds utility. Walk-in closets are often connected directly. Some homeowners add a small exercise corner.
Privacy is key. A separate compartment for the toilet, which prevents noise and odors from the shower. A full-length mirror is mandatory. Brass or gold-plated fixtures improve the look. This is a spa for two.
Family bathroom
This room takes a beating. This is everyone’s hub. Kids. teenagers. parents. Usually used by one person at a time. Unless it’s morning rush hour. Then, everyone converges.
Location is important. It is standard near the bedroom. The upper floors of two-story houses may have a fully equipped bathroom. Downstairs is a powder room or half bath. The half bath has a sink, toilet and possibly a shower. There is no bathtub.
Durability is non-negotiable. The surface must withstand splashes, soap scum and small children’s fingerprints. But it can’t look sterile. Even adults want it to look good.
Storage is the biggest challenge. You need a large vanity. A double sink are useful during peak times. Upper and lower cabinets and closets can hide clutter. Everyone needs a designated shelf. Behind closed doors. This prevents visual clutter.
Privacy requires creative solutions. The transparent shower door expands the space. Opaque curtains provide visual separation. If the room is large enough, add a separate door to the toilet. Ideally, the second entrance would be from the hallway. If this is not possible, place the toilet further away from the door. A half-wall partition is effective.
Towel rings of different sizes are suitable for everyone. Hooks for robes is mandatory. Choose a calm color scheme. Something neutral that doesn’t conflict with someone’s favorite towel color. Add a beautiful alarm clock. Reminder about sharing space. It sounds silly. But it helps keep the peace.
Children’s bath
Safety first. Territory is the conflict. When designing for children and youth, you need to consider both of these Kidss. Universal design principles are useful here. create a space that grows with the user.
Start with the sink. Double vanity prevents conflicts. At least one large sink is required. If space allows, separate the shower and bathtub. A combo unit are less secure. If you must combine them, use a sliding shower head on the bar. It adjusts for height. It helps children. It helps wheelchair users.
Organization stops squabbling. Assign personal spots. towel. robe. toothbrush. Color code them. If you have a boy and a girl in the same room, choose a color palette that suits both. blue and coral. green and yellow. Geometric pattern stripes. Tartan. Something fresh but timeless.
Walls take a beating. Tile. Washable vinyl wallpaper. Enamel paint. Go all the way up. If the age difference is large, install a full-length safety glass mirror. Place the Towel Bar at the appropriate height. Light switches should be placed low and within reach of small children.
The floor must be non-slip. The corners of worktops and cabinets must be rounded. If you use a bathtub, specify a slip-resistant floor liner. Safety glass is standard in the mirror and shower door. Ground all electrical outlets. Keep away from water.
Grab bars are smart. Sufficient wall support is required. However, children can accidentally use the towel bar as a handle. Real grab bars prevent accidents and protect your hardware.
The water temperature is dangerous. Install anti-scald faucet. Set the limit to 120 degrees Fahrenheit. Children’s skin is thin. Three seconds of 140-degree water can cause third degree burns. It happens fast.
There is also the risk of poisoning and drowning. Install safety latches in the lower cabinet. Install the toilet lid lock. Teenagers need to be careful. Store chemicals and medicines in the upper cabinet. It’s out of reach. It’s not easy for small children.
Powder room/half bath
Where should you take a half bath and why is it important?
Powder rooms are small in nature. Sink. Toilet. That’s it. Or you can use a shower instead of a bathtub and call it a half bath. This configuration is very versatile. This facility, hidden in the basement, transforms a boring recreational space into living space. Place it next to your study or home office to effectively create a private suite.
Location dictates function. Near the dining room, it is pure convenience for dinner guests. But be careful. The entrance must be from the hallway. Do not open the bathroom door directly into the dining room. This is a strict rule.
Designed for all occasions
These spaces are often referred to as “guest bathrooms” and offer a lot of design freedom. We are not bound by strict practicality here. If it sits off the dining room, lean into elegance.
Think of a gorgeous golden mirror. Luxurious wallpaper. An artificial wall treatment that imitates plaster. Gold and brass accessories are eye-catching. Decorated fingertip towels add a luxurious finishing touch. This is to create an impression before people see the toilet.
The basement washroom tells a different story. whimsy is allowed. Evoke a woodsy fishing cabin with rustic textures. Enjoy the breezy beach house feel, light wood and coastal style. Or venture to a romantic destination that feels like a secret paradise. The most important thing is the atmosphere.
If your half bath is next to your den, match this style. Garden-fresh greens. Or crisply tailored neutral tones. Consistency creates a sense of unity in your home. This shows that the small space was deliberately designed and not squeezed into it.
Make the most of small spaces
Space is always at a premium in a powder room. You need a storage space that does not take up floor space. Beautiful pedestal sinks are a standard solution. It keeps the floor visible, making the room feel larger.
When it comes to toiletries, don’t clutter your sink. Store extra bathroom accessories in separate baskets or drawers with lids. Stay organized. Visual expansion is as important as physical space. Large areas of mirror do heavy lifting here. They bounce light. The perceived depth of the room is doubled.
Beyond standard layouts
A master bath and laundry room are also standard. looking forward to it. But have you ever considered connecting your bathroom directly to your gym or laundry room?
These special bathrooms meet special needs. At the gym, you can save time between showering and training. A laundry room bathroom adds comfort to a busy cleaning area.
On the next page, we look at an array of these specialty bathrooms.
For more information on decorating and renewing a bathroom, visit:
-
decorate the bathroom
-
ideas for decorating children’s bathrooms
-
tips for decorating your home
Today, most homes have more than a second bathroom. They get specialized bathrooms. If you are building a new home, you can clear unused rooms, hallways and even awkward spaces above the garage. Or you can improve an existing layout. Here’s how to handle the three most common types.
Master Suite – Bathroom layout
The master bathroom is next to the bedroom. The Master Suite is different. The bathroom itself becomes part of the bedroom. The whole area is behind the door leading to the main corridor.
Size doesn’t matter, cohesion is more important. Sharing a design scheme of the bedroom and bathroom makes the space larger and more stylish. The bedroom has soft furniture. Bathroom surfaces are hard. Can be tied to a theme. Think Neoclassical, English Country, Early American, or Soft Modern. Both use the same color palette.
Create variations by changing the proportions of these colors. Imagine a stunning European-style bedroom in deep burgundy with accents of hunter green, gold and ivory. The master bathroom features hunter green fixtures, brass hardware, and ivory tile. Spark it all with wine-colored towels.
Noise is a real problem. Avoid placing amenities such as pressurized toilets or showers on walls that are shared with sleeping areas. It also buffers sound. Place the bath cabinets on one side of the wall and the bedroom closets on the other side. Place the bed further against the wall.
Location is important for safety and light. If possible, put the bath against an outside wall with a window. The corridor between the bed and the bathroom should be wide, barrier-free and easily accessible. Think about when the user is in the dark or sick.
Private Toilet Compartment
The couple’s morning is chaotic. Everyone hurried to get ready. Shared bathrooms are under more pressure than ever. Even intimate couples often need their private toilet compartment. Larger bathrooms are beginning to reflect this need.
The waste stack determines where the toilet goes. You can use a separate compartment if it is located far away on the wall or in a corner. The walls should cover the entire height of the room. It should extend at least 3 feet in front of the toilet and at least 1 foot on each side. Achieve wider universal accessibility.
Light and air are non-negotiable. Install an easily accessible artificial light source. If possible, add a skylight or a small window. Don’t have a working window? You need to install an exhaust fan to keep the space fresh.
Don’t forget storage. Design a wall cabinet above the toilet tank for storing frequently used items. Leave floor space for a small trash can.
Pocket doors save valuable floor space and guarantee privacy.
If you can’t full compartment isn’t possible, find a compromise. A half-high partition tiled like the adjacent wall also works. Or use a tall, fabric-covered hinged screen to match the mood of the room. These are perfect if the toilet is in or near a corner.
Exercise Room Bathroom
You are going to jump in the shower after my workout. So why not bring the gym into your bathroom? This is the logic behind the gym bathroom.
This only works if you have the space. Plan to install all bathroom fixtures on the surrounding walls. Move the door to make room for two exercise machines.
Do not block access to doors or equipment. Measure the space required for proper use of all equipment. Give them plenty of berth.
Safety is extremely important. Specify non-slip floor tiles. Sweat and water will be everywhere. You need traction. Also plan a proper ventilation system. Sweat and moisture must escape somewhere.
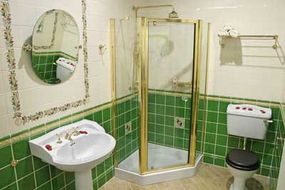
Homeowners are moving away from traditional basement installations. Currently, the washing machine and dryer are located in mudrooms or kitchens. But there is another trend that is gaining momentum. This includes installing equipment in areas where dirty laundry actually accumulates. Think about your bedroom. Think about your bathroom.
If you live alone or just with your partner, it makes sense to store your laundry in the master suite. Remove the sheet, discard the jeans and throw them in the machine. No carrying a basket through half the house.
Do you want to share space with children? The math changes. Your master suite might be full of soccer jerseys and muddy sneakers. In this case, check the children’s restroom or nearby guest restroom. It acts as a bottleneck. You catch the mess before it spreads.
“In the daily workflow, location is more important than aesthetics.”
Consider the plumbing. Adding a half bath or updating a guest bathroom with a Stackable unit requires access to plumbing and drainage. The costs are lower if the bathroom is already close to the ventilation duct. Avoid costly drywall removal and pipe rerouting.
Check the width of your door. Standard washers are 27 inches wide. Stackable units are narrower. Please measure your hallway and bathroom doorways before purchasing. You don’t have to squeeze heavy boxes into a 30-inch frame.
Electrical requirements vary. The dryer requires a 240 volt circuit. Dryer cords are thick. Old wall channels can be tight. If you’re remodeling your bathroom, make sure your electrical panel can handle the load. Hire a qualified electrician. Don’t guess when it comes to high voltage equipment.
Ventilation is another obstacle. The ventilation openings of the gas dryer are located outside. Electric dryers can be ventilated internally via a condensing unit. condensing is often better. A good fan can help regulate humidity. If you are using a standard vent, run it directly outside. Do not pour it into the attic. Moisture causes mold. Mold can destroy plasterboard.
Storage is also important. The laundry corner in the bedroom should have space for detergent, baskets, and ironing equipment. Bathroom settings may share space with toiletries. Keep chemicals separate. Never mix bleach and ammonia. Read the label.
Is it worth renovating? It depends on your daily habits. If you do laundry every day, the closer it is, the better. If you charge it once a week, your basement will be fine. But for those who keep laundry to a minimum as a chore, keeping your laundry in the suite can save you a step. The steps add up.
Look at the floor. Ceramic tiles are very durable. It handles spills. It is not a good idea to install carpets near water sources. Vinyl planking is a great middle ground. Waterproof and keeps your feet warm.
Lighting is often overlooked. Install a bright LED light above the washing machine. You need to see stains. You need to see pockets. Dim lighting hides the details.
Let’s think about noise. The washing machine spins at high speed. In the bedroom, vibrations can be transmitted through the floor. Use anti-vibration pads under the feet. Isolate the machine from the walls if possible. Sleep is important.
Pipe and electrical logistics
Map utilities before tearing down walls. Shut-off valves must be easy to use. If water leaks from the washing machine, it should be stopped immediately. Slow leaks can damage the floor. Fast leaks ruin foundations.
Check GFCI outlets. Bath
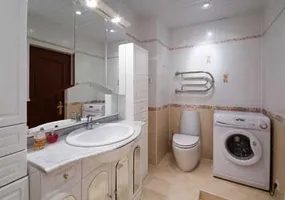
Laundry niche
You can connect your laundry equipment to the existing plumbing of your bathroom. This is cheaper and easier than running new lines in your home. Pair it with a non-porous, non-slip tile floor that extends from the bathroom to this small area. The results seem intentional. Clean. Unified.
Space is often your enemy here. If floor space is limited, stacked washer-dryer unit are a practical choice. Save floor space. The trade-off is capacity. These machines can handle smaller loads. You may find yourself doing smaller loads more often as a family instead of all at once.
Storage must be vertical. Install lots of overhead cabinets. Closed storage prevents dust from entering and hides the visual noise of detergent bottles and bleach. Keep baskets nearby for easy sorting.
Access is important. Pocket doors or folding doors are perfect for hiding machines without affecting the aesthetics of your bathroom. However, consider dual access. Privacy can be maintained if the corner of the laundry room can be accessed from the hallway or bedroom without having to go through the shower or toilet. No one wants to go through a wet bathroom to get their clothes.
Adjacent wardrobe strategy
The wardrobe between the bedroom and the bathroom is very efficient. They create a dressing zone. Next to the bathroom is a spacious wardrobe area that feels like a luxurious hotel suite.
Don’t ignore the remaining space. That pesky hallway closet? Use it. An unused corner of your bedroom? Measured and fitted. If you have a continuous layout, you can also use the corner of the bathtub itself.
This is where an professional input pays off. Tell the architect or contractor exactly what you need. They know how to pack extra storage into weird corners. Once the shell is built, bring in a closet design pro. Or go to the hardware section of your local home hardware store. You’ll find shelving systems and hooks to maximize every inch.
The same principle applies to the kitchen pantries or garage storage. Standardize your system early.
For more information on decorating and renewing a bathroom, visit:
-
decorate the bathroom
-
ideas for decorating children’s bathrooms
-
tips for decorating your home
Bathroom layout requirements
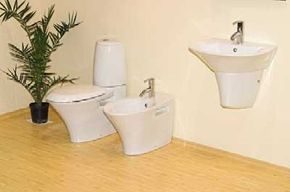
The standard 537 square foot footprint is perfect for a powder room or half bath. It’s big enough to clean quickly, but small enough to not take up much of your floor plan. If you are considering designing a children’s bathroom, this is a good size for two children at once, as long as you use the storage space wisely. Organize a separate storage space for towels and toothbrushes for each child. It can also be considered a master bathroom if its primary purpose is simply to place the plumbing near the bedroom for late night convenience.
But let’s face it. If you’re looking for luxury, constraint falls apart. A luxurious master suite with bidet, separate jacuzzi and sauna? Out. By today’s standards, even a shared family bathroom would feel small. You can use design tricks to disguise the volume. Keep the color scheme restrained. Use mirrors to reflect ambient light. Install practical cabinets such as lazy Susans, spice boxes and deep underwear chests. These small details make the most of every inch.
However, design skills alone cannot create a physical space. If you need more space, you have to steal it. See if you can encroach on an adjacent closet or the unused corner of the next hallway. Maybe you can bump out a mini-addition. An increase of only 18 inches may seem insignificant in most rooms. That extra half foot makes a huge difference in the bath.
The realities of plumbing in basements and upper floors
Installing a new bathroom in an existing home is more difficult than renovating an old bathroom or building a new home. You fight a “back-of-the-wall” plumbing. You don’t know what you’re dealing with unless you tear up the drywall and look at existing mechanicals. This is gambling.
It’s even worse if you work on the second floor or basement. Gravity is your enemy here.
Basement bathrooms require serious planning for below-grade plumbing. You need at least 16 square feet for a toilet and a sink. If you need a shower or tub, you’ll need about 35 square feet to make it work, bringing you back to the standard 537 square feet.
The building rules are a bit more relaxed here. You can get away with an 84-inch ceiling height in a basement bath. This is 6 inches shorter than the residential standard. This difference can be a lifesaver when pipes and ducts take up space above.
What is the hardest part? Drainage.
Adding hot and cold water to the basement is easy. Just connect to the existing supply line. Wastewater “drainage” is a headache. All equipment must be emptied into the main drain. It is a 3- to 4-inch diameter pipe. Enter the basement from the upper floor and exit through the walls and floor.
If you are installing a toilet in a new location, you may have to make cuts in the concrete floor. It’s a brutal job. You need a concrete saw and serious grit. However, there is limited in how far you can move fixtures from the existing drain. Each leg of the extension must slope down at least 1/4 inch per leg. If the tilt is not correct, it won’t flush. If there is no slope, you cannot place the toilet.
Upper Floor Constraints
On the second floor, the challenge shifted from cutting the concrete to supporting the weight and laying the pipes to the finished space. but you are dealing with joists and subflooring. It is often necessary to make cuts in the ceiling of the room below to create the necessary drainage slope. This means coordinating with the neighbors below, or at least accepting the dust and noise.
Pipe stacks usually run vertically through the center of the house. Moving a bathroom far from a stack requires longer pipes. The longer the run, the more joints there will be. The more joints there are, the more likely leaks will occur. Every elbow and tee is a point of failure. If you are a do-it-yourselfer, you need to be familiar with PVC or PEX and you need to know your local ventilation codes. Ventilation pipes are just as important as drainage pipes. Without proper ventilation, siphoning and gurgling can occur. Air needs a path to enter the system.
Material selection for small spaces
When the scope of work is limited, every choice of material is important. Oversized tiles can actually make a small bathroom appear larger by reducing the number of grout lines. However, it is more difficult to cut and install. If you are inexperienced with wet sawing, use regular 12×12 or 4×4 tiles. can eat your
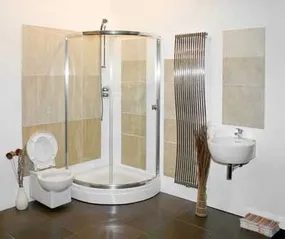
Wastewater treatment when gravity no longer works
If the pipe cannot be easily dropped into the ground due to a concrete slab or existing foundation, a sewage ejector is the only right option. This is an electric pump installed inside a closed tank. The machine grabs the waste and pushes it through the drain into the main building’s drain.
Sewage ejectors are very expensive, but they are not much more noisy than today’s pressure-assisted toilets. You will also need to connect the new drain pipe to the existing vent pipe or install the new pipe in an inconspicuous location, usually outside your home.
The new bathroom on the second floor should also be connected to the existing main drain and vent pipes, but this is usually easier to do because the upper floors and walls are not concrete. Not to mention, the higher floors allow gravity to move the waste down instead of gravity being a hindrance.
No matter where you plan to install your new bathtub, you know that installation is not for amateurs. If your specialty is not pipe or mechanical engineering, contact a professional to save your energy for choosing fixtures and decorative treatments.
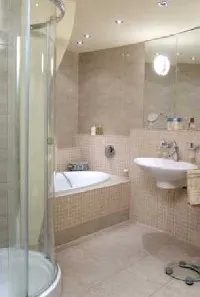
You may have noticed that many bathrooms share walls with other Bathrooms. Or the contractor might ask you not to move the toilet because it’s a hassle. It’s not just stubbornness. This is invisible infrastructure.
Plumbing work “behind the wall” can be scary. It’s not just about moving the sink. You are dealing with fresh water lines. Hot water returns. Waste drains. Vent stacks that equalize pressure. Leaving vents out can allow sewer gases into your home. Gross.
Even if your bathroom is on the third floor, these pipes reach up to the ceiling to a system buried in the lawn. The fixtures are just the end point. The actual work is done inside the walls.
It’s okay if you’re not interested in engineering, Respect complexity. Installers don’t just solve problems. They deal with this problem within strict building standards. These regulations are there to keep your family from inhaling methane. Your understanding helps you get a better job done.
Toilets and plumbing: Moving Things vs. Moving Beds
Are you renovating your current bathroom? you have a choice. Spend the money to move fixtures? Or keep the layout and hope for the best?
Moving a toilet a few feet for a slightly better look? Perhaps. The costs may outweigh the aesthetic benefits. But what if your current layout isn’t working? Relocation becomes a top priority.
Remember: moving a toilet is not like moving a king-size bed. This bed does not require a 4 inch PVC drain pipe connected to the ceiling vent. Complexity is high. The stakes are even higher.
Which bathroom floor plan suits your space?
Practically all bathrooms belong to one of three basic configurations. Once you know which one fits your floor plan, you can saves headaches later.
1. One-Wall Layout
This is the simplest solution. The toilet, sink, shower and bathtub are all on the same wall. This creates a long and narrow room.
It is often seen in powder rooms and half baths. This also often happens when cutting the end of a long corridor to create a bathroom.
Can you add extra fixtures? Sure. Bidet. Separate bathtub. A separate shower. However, this is not common. The walls quickly became congested.
2. Two-Wall Layout
Here, you split the fixtures. The toilet and sink are along one wall. The shower or bathtub is on the opposite wall.
Sometimes the toilet and bidet share a wall. The shower and sink take the other. This depends on the length of each wall.
This layout creates a sense of enclosure. It feels more “designed” than the single-wall option. But be careful. Place fixtures far enough apart. Keep it away from the door. You need room to open the door and stand comfortably. Safety first.
3. Three-Wall Layout
This is the king of space saving.
The toilet is along one wall. Sink on another. Shower/tub on the third.
Each facility is located a short distance from other facilities. It’s efficient. This is reflected in the luxuriously updated bathroom. Several sinks. Separate bathtub. shower. Bidet.
If you’re renovating an old bathroom and want to install a lot of new ones, it’s easiest to work in a room that’s already been plumbed for a three-wall layout. The pipe is already in the correct position.
What next? Lighting and ventilation
Once you’ve decided on your layout, you need to consider wind and light. Poor ventilation can lead to mold growth. Bad lighting makes shaving a gamble.
The following pages will tell you about the importance of bathroom lighting and ventilation.
For more information on decorating and renewing a bathroom, visit:
-
decorate the bathroom
-
ideas for decorating children’s bathrooms
-
tips for decorating your home
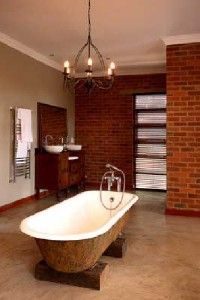
Ventilation: The unsung hero of bathroom health
You may be obsessed with tiles and faucets, but don’t forget the air. Fans are not a luxury product. This is a structural necessity. Windows? Great in theory. In fact, in most climates this is terrible. It cannot prevent moisture. It is not effective in removing odors. And they certainly cannot protect the bones of the house from decay.
Moisture is your enemy. Hidden behind plasterboard. It penetrates the insulation. Only when the mold takes root does it await your attention. The right exhaust system in the bathroom helps to remove moist and dirty air. Keep the exterior walls of your home dry.
Look for devices that do more than just spin. Let’s combine it with lights. Increase heat with infrared rays. These combination devices are very practical. Save ceiling space. Improves comfort immediately. Think of it as insurance for your walls.
Lighting layer: safety before style
Bathrooms are slip and fall risk areas. Good lighting is more than just appearance. It’s all about visibility. We need three different layers.
First, general ambient light. You have to look at the floor. We must navigate safely.
The second is task lighting. You need shadow-free lighting when driving. Make-up requires precision. If you’re dealing with splinters or cuts, shine a clear, bright light on your dresser.
The third is mood lighting. This is optional but common. Consider dramatic mirror lighting. Removes shadows from the face. The room feels spacious. Try to combine it with light walls. reflects light. They reinforce the effect.
NKBA Guide: Safety Checklist
Building regulations are the minimum requirement of the law. they have changed. They are following new safety research. However, the National Kitchen and Bath Association (NKBA) offers 41 specific guidelines. These are all proven. It’s practical. You can prevent accidents.
Follow these measurements. they are important.
- Entry/Exit : Leave at least 32 inches of clear space. This makes it easier to access, especially for future wheelchairs and hospital beds.
- Toilet area : Leave 48 inches of clear space in front of the toilet. Measured from the center line, you need 16 inches on each side.
- Sink Clearance : Allow at least 15 inches of space on either side of the sink centerline. Don’t fill yourself with vanity.
- Shower Door : Make sure it’s open to access the bathroom. If you slip inside, you need a clear path to escape. Never lock yourself in.
- Safety of the bathtub : Install support bars next to the bathtub. There are no stairs. It is simply a curb or threshold.
- Faucet Distance : Make sure the Bathtub faucet is accessible from both inside and outside the bathtub. There’s no need to dive in to shut off the water.
- Toilet Closet : Make sure it is at least 36 inches deep.
- Handrails : These handrails must support at least 300 pounds. Test them. Attach to studs and plasterboard anchors.
“Code is constantly changing to reflect new understanding of hazards in the built environment.”
Electrical planning is part of this safety ecosystem. An electrical outlet is required near the dresser. GFCI protection may be required Wherever water is available. Pull more yarn than you think is necessary. technical change. So are your needs.
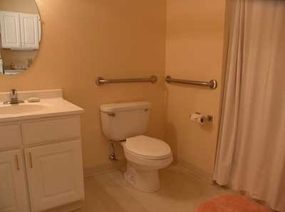
The National Kitchen and Bath Association (NKBA) does more than just create rules. They created the framework for universal access bathroom design. This has nothing to do with compliance checkboxes. It’s about creating a space that everyone can use.
This change began with the Americans with Disabilities Act (ADA). This law changed the way we think about public and commercial buildings. It moved them from “off-limits” to accessible. But the benefits go far beyond the legal requirements.
Universal access now means ease of living. It helps children. It can help the elderly. It is helpful for pregnant women. It will help anyone who has ever struggled with uncomfortable fixtures. Grab bars and wide doorways are just two examples. It will make your bath more comfortable today. They will protect you tomorrow too.
Why is universal design important now?
You might think that accessibility is something that only the traditionally “disabled” can enjoy. This is a narrow view. Think about the last time you carried groceries in one hand and your child in the other. You can’t easily fit through narrow doors. It’s true that you can’t grip a smooth faucet very well.
Consider aging now. Most of us experience some form of mobility decline. Risks can be reduced by designing bathrooms that take into account the principles of universal access. Reduces stress. Add dignity.
The NKBA guidelines guide this. Promotes functionality for all body types and abilities. This is not just a good thing. This is very practical.
Design a universal bathroom
Once you have decided on the basic structure of your new bathroom, you can further modify it. Start with the structure.
Consider the width of the door. Standard door widths are usually 24 inches or 28 inches. The general model recommends 32 inches or more. Maybe there are more. This allows the use of a wheelchair or walker. It also makes it easier to move large objects.
Consider a railing. It’s not just about showering. Place it near the toilet. Put them in the bathtub. Make sure it is firmly attached to the studs. Drywall anchors break under pressure. You need strong support.
Fun bathroom decor
Decorating a universal bathroom does not mean sacrificing style. It means making smarter choices.
- ** Floors:** Non-slip tiles are mandatory. Look for a matte finish. Do not use shiny surfaces in damp areas.
- Lighting: Bright, even lighting reduces shadows and the risk of tripping. Attach the lights to both sides of the mirror.
- Storage: Pull-out shelves are easier to access than deep, dark cabinets. Store frequently used items at waist height.
- Fixtures: The lever handle is easier to use than the round knob. Consider using touchless faucets for hygiene and convenience.
Don’t just choose good colors in magazines. Choose durable materials. Choose a finish that is easy to clean. Choose a layout that flows.
Where do we go from here?
We already have the structure. Security features are already enabled. Now comes the fun part. The decor.
If you want to learn more about a particular style, there are plenty of resources. General aesthetic advice can be found in decorating a bathroom. If you have children, check out kids bathroom decorating ideas. In any case, they often overlap with universal design principles.
See home decorating tips for further instructions.
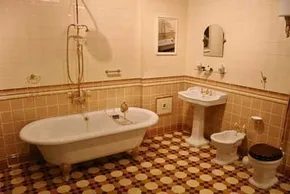
There is a bathtub. You’ve got the tiles. Next comes the part of making the room really feel like “yours”.
Decorating isn’t just about buying cute things. In this way, the violation of the rule about avoiding disorder of the space is avoided. Humans are wired to spot imbalance. It causes low level anxiety. See the heavy vase on one side of the shelf and the small candle on the other? Your brain says, “Stop!” This is not a design flaw. This is a psychological trigger.
Bad design costs money. A cheap room with good principles is better than a luxurious bathroom without principles. Here is how to make yours work.
Achieve visual balance
Balance is more than symmetry. It’s about weight.
Symmetrical balance is easy to find. Draw a line down the middle. If the left side mirrors the right, you’ve done it. Imagine a classic vanity with a mirror in the middle and matching lamps on either side. This is traditional. It’s dignified. It is very safe. It was also used in the early American country style, but the materials were more rustic.
Asymmetrical balance is even more difficult. It’s sophisticated. It’s also riskier.
It’s not mirroring, it’s balance mass. The large sculpture on one side might be offset by three smaller objects grouped on the other side. Although the objects are different, they have the same overall visual weight. In a bathroom, this might look like a large freestanding bathtub on one wall and a toilet and bidet on the other. It fits well in a modern or Asian-style space. It feels dynamic.
Color is important here. A bright red vase is visually heavier than a white vase. You need less red to balance the space.
If you are not sure, see professional photos. Explore why they work. If in doubt, ask a professional. Installed devices cannot be easily moved.
Create rhythm through repetition
Rhythm is repetition.
Too little? Chaos. Too much? Boring.
The brain loves patterns. It seeks them out. Find them and relax. You can put this to good use.
Repeat the sequence. color. form. structure. But don’t just repeat it endlessly. Insert “rests”.
Take a black-and-white scheme. It’s a simple rhythm. Now things get complicated. Green, green, blue, blue, ivory, ivory and crimson. The crimson breaks the pattern. It catches the eye. It gives direction to the rhythm.
Texture creates rhythm in the bathroom. Smooth tiles, then rough limestone. Cotton towels interspersed with hard surfaces. If the tiles are white and the towels are pink, two rhythms occur simultaneously. One is color. One is for textures.
The depth increases. Prevents the room from feeling flat.
Establishing a Focal Point
Every room needs a hero.
The key is to create a focal point. You should focus on that first. It should go back there. This is a resting place.
Designers say: find your focal point first.
There is a hierarchy.
The bay window wins over the fireplace. The fireplace beats the TV. A TV beats an armoire.
Usually the biggest object in the room wins.
In the bedroom it is the bed.
In the bathroom, it is usually a bathtub. Or vanity.
Maybe you have a double vanity with two mirrors. Or a massive soaking tub angled in the corner. That’s your focal point. Everything else supports it.
Don’t fight. Lean into it.
If you ignore the focal point, the room feels scattered. The eye doesn’t know where to go. It bounces around. It tires out.
Give it a place to land.
Then build the rest of the room around the anchor point. Use balance to stabilize it. Guide the eye through space with the help of rhythm.
This is not magic. It’s just physics. The physics of vision.
Do you have a statement piece already? Or are you starting from scratch? The choice dictates the layout.
“A modest room with intelligent application of design principles is certainly better than a more expensive room without intelligent application of design principles.”
Start with the weight. Next, find the pattern. Finally, let the eye rest.
One step at a time.
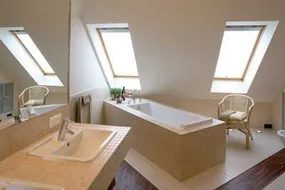
You can choose the direction of your gaze. It blends into the natural structure of the room. Or create your own spotlight.
Bright colors attract attention. The same goes for mirrors. Moving objects such as aquariums add kinetic energy. Wind chimes also work if they are large enough to receive light.
Use these elements to create alternate focus.
Balance is the key here. You want to avoid giving a heavy impression to the other side of the room. Add eye-catching details to secondary objects. Here is a small vase. There were clear towels. It keeps the eye moving. But don’t be confused. The public needs to catch on quickly. Too complex scenes can weaken the effect.
The space feels right when balance, rhythm and emphasis work in harmony. It’s peaceful. This is very interesting. Start small. Your bathroom is a perfect laboratory. Please find out. Then bring the lesson into your living room.
Color and shape determine the atmosphere. You can create a light and airy atmosphere in your bathroom. Or feel warm and calm.
Vertical tiles and textured wallpaper
The next step involves preparing the surface. Vertical tiles extend the height of the ceiling. Makes the space feel higher. Textured wallpaper adds depth. It changes the way light hits the surface.
Make use of color, texture and space in your bathroom
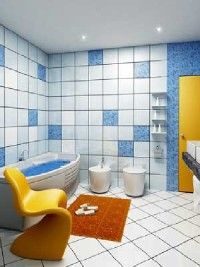
Choose the perfect color palette for your bath
Your bathroom already has the basics of balance and rhythm. They are just hiding in plain sight. Once you start noticing them, the adjustments will become obvious. It’s not a redesign from scratch. You make adjustments. A little movement. Great impact on eye appeal.
Why color determines space
The heavy lifting here is color. It’s not just a matter of taste. This is physics. The light will bounce back. The light has been eaten away. How the paint interacts with the vanity lamps changes the overall feel of the room.
Think about scale. Bright colors are reflective. They pushed back against the wall. They make your cramped powder room feel like a closet. Dark colors are absorbed. They tighten everything up. If you have a small tub, this is nice. Or suffocate. It depends on your nerves.
Contrast is the enemy of space. High contrast catches the eye. Create a visual speed bump. When you put a dark floor on top of bright white walls, your brain shuts down. Instead of seeing the whole room, you can now see a part of it.
Low contrast keeps the eye moving. Smoothes the surface. The result is a space that feels much larger than its surface area.
Warm and cool colors: Depth techniques
Warm colors such as red, orange and yellow move forward. they are coming towards you. The walls feel a few inches closer. Pastel colors like peach and cream are still advance. But the intensity depends on the white content. The pale pink is very gentle. Bright pink is aggressive.
Cool colors like blue, green and purple are receding. They push away. They create distance. The blue tiles in your shower don’t just look blue, they look very deep. Add invisible space.
The real decision
Most guides advise you to go light and cool. Make the most of your space. I maintain maximum tranquility. This is a sure bet. It works in almost all sizes and styles.
But some homeowners want a blush shade. Not for space. for complexion. Good lighting combined with warm pastels makes your skin look better than sterile white. This is the truth about vanity.
Some people accept smallness. They choose dark, rich colors. plum. Navy. charcoal. They tend to be intimate. It’s a bold move with a small footprint, but one that can be incredibly luxurious if done right.
There’s no right answer here. We only offer products that match your face shape, brightness and risk tolerance. Choose a shade. Test it on the wall. Live with it for 3 days. Observe the light changes from 6 a.m. versus 6 p.m. You can tell by the color if it is effective or not. Often the sunset reveals the truth.
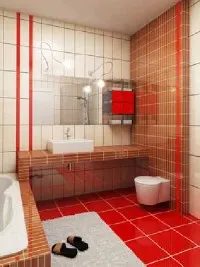
Natural light in the bathroom is not the same. The orientation of the windows is more important than you think. Places facing north and east allow cool blue light to shine into the room. The south and west walls are burned by warm red sunlight. This will change how your chosen paint will actually look on the wall.
Artificial lighting adds complexity. Unless you install an expensive full-spectrum bulb that mimics the sun, the color temperature of the bulb will be distorted. Fluorescent tubes add a cool blue-green hue. Incandescent bulbs lean hot and yellow-red.
Use this to your advantage. If the morning light is cold, warm up the room with cheerful Daffodil Yellow Paint. When the afternoon sun turns your room into a sauna, cool off with icy lilac or soft aqua. Test the sample first. The shift in tone can be drastic.
Color Scheming
Choosing a neutral color palette requires an understanding of relationships. Imagine a color wheel. It follows the order of the rainbow: red, orange, yellow, green, blue and purple.
- Tints are made by adding white. Red orange plus white is coral.
- Shades are made by adding black. Blue-green plus black becomes teal.
Understanding these basics will help you build a program that is intentional and not haphazard. Start with your favorite shade. Next, choose a structure.
Monochrome
This is the safest route to luxury. Repeat one color with different tones and shades. It is often used in luxury bathrooms to create a sophisticated, seamless look. Think neutral colors from ivory to tan. It goes well with classic traditional spaces and stark modern spaces.
For a Victorian feel, try a solid red. The pink color of the bas-relief can turn into a rose color and then into a deep burgundy. Texture is important here. If you don’t have an eye-catching color option, you need a different material to make it stand out.
Analogous
These are the easiest schemes to pull off. Use adjacent colors on the color wheel. Include tones and hues in these areas.
- Blue-violet, blue, and blue-green? Enjoy an underwater fantasy. Tones range from icy periwinkle to deep teal.
- Yellow-orange, yellow, and yellow-green? A cheery, refreshing spot. Think cantaloupe to honeydew melon.
Complementary
These schemes are inherently dynamic. These are based on color pairs that are opposite each other on the color wheel. What’s the trick? Don’t use them at equal intensity. The contrast between the fire engine red and Kelly Green is striking.
The soft version works better. Pale pink with evergreen is lovely. Royal blue with peach is beguiling. Yellow and violet can look regal in gold and purple. Or springtime-pretty in jonquil and iris tones. Contrast creates visual energy without causing headaches.
Split Complementary
This is a safer way to use opposites. You can also use two colors on each side instead of directly opposite colors.
*Teal (light blue or teal) creates a tropical atmosphere combined with orange (peach) and red (pink).
* Yellow is combined with red-purple (orchids) and blue-violet (periwinkle) to create spring garden aesthetics.
Double-Split Complementary
This can be seen in designer fabrics. The cheat code for this system is to copy the dimensions from the pattern. Use two colors on each side of the base color and then two colors on either side of that color’s complementary color.
Similar to split complementary colors, only four primary colors are used. If you love red and true blue, shake it up. Add red-orange and red-purple. Add blue-green and blue-violet. It is complex but balanced.
Triad
This design uses three colors that are equidistant from each other on the color wheel. red, blue, yellow. It’s a classic for a reason.
These bright basic colors are perfect for children’s rooms. Counting it creates a formal space. Burgundy, navy and old ivory create an elegant federal style room. The spacing of the color wheel prevents colors from clashing with each other.
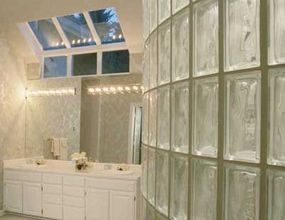
You have a palette. Go ahead and do it.
Strip the color scheme back. Breathe white. This is the easiest way to make your bathroom look less like a cave. Or lean on the dark side. If you’re feeling bold, gray and black Accents add drama. However, don’t forget the earthy tones. Tan, brown, taupe – they create the basis of the space. And what about green? Living plants bring life. literally.
Here are some rules of thumb to avoid blowing your budget on mismatched tiles:
- Choose a main color. Usually the lightest. Use it everywhere.
- Choose a secondary color. A midtone. Use it for fixtures and large accessories.
- Add one or two tertiary colors. The brightest or darkest tones. Use with caution.
Play with chips. Tape them up. Live with them for a day. Then commit.
Then look at the mess. All this. Shampoo bottles. Toothbrushes. Random lotions. They are the rainbow of chaos. Decant them. Buy uniform containers. Match the colors to a new scheme. Reduce visual noise. Seriously. Try it. Your brain will thank you. The less visual chatter you have, the more relaxed you will be.
Wet area textures and patterns
Color is only half the story. The other half is touch. And sight.
The bathroom is very wet. So they are hard. Smooth. The walls are covered with glazed tiles. Marble or laminate on the vanity. porcelain. metal. glass. mirror. These surfaces reflect light. They show every fingerprint. They are cold.
We need contrast.
Place unglazed tiles on the floor. Matte finish. It’s safer. Less slippery. Or use tumbled marble for the walls. It breaks up the slickness. The depth increases.
If you aren’t doing a full tear-out, fake it. Fluffy towels. Cozy rugs. Secure them with rug pads or non-slip tape. Nothing ruins a good design like tripping over a rug.
Texture and pattern are very similar. They often show up together. Sometimes apart.
Look at wood. Oak is coarse-grained. it is pronounced. It adds texture. It adds pattern. Maple? Smooth-grained. It’s quieter. Less busy. Faux veneer cabinets mimic the look of real wood grain, but without the physical texture. Antiqued cabinets have paint layers that create depth.
More texture means more “busier”. More busy-ness makes the room feels small. If your bath is tiny, keep the surface smooth. Keep patterns to a minimum.
Lines and shapes for spatial illusions
Lines determine how we perceive space. They are invisible guides.
Vertical lines expand the room upwards. Look for them in wall cabinets. Windows. The frame of the shower stall. door. If you think your ceiling is too low, emphasize these verticals. Paint the trim by painting it the same color as the wall.
Horizontal lines expand the space. Focus on the edges. The vanity counter. The top of the bathtub. Long, continuous lines make a small bathroom feel larger.
Floor tiles play a big role in this game. How you lay them changes the geometry.
Place the tiles parallel to the wall. standard. Predictable.
Place it diagonally. Suddenly the floor seemed much wider. Eyes follow the corner. Create a sense of space. This is a simple trick. it works.
Which method is suitable for your space? Vertical height? Width? Diagonal ratio?
There is no single right answer. Only use the one that fits your square footage and maintenance tolerances. hard surface
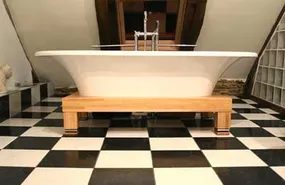
Balance proportions and visual weight
Most standard bathrooms are 537 square feet and have a comfortable ceiling height of 8 to 10 feet. Height usually trumps width, so you don’t need to do anything to make a room feel taller. If you have a large floor area, think of it as a living room or a bedroom. Maintain vertical balance with floor space.
In a room this small, shape is rarely an issue. The corners of the bedroom can be filled with round tables or oval chairs to soften the hard lines of doors, windows and wardrobes. Bathtubs are different. The fixtures themselves, such as bathtubs, sinks and toilets, bring curves. It’s a stark contrast to the boxy architecture.
However, the balance can be broken. Too many straight edges. divided-light windows. rectangular tiles. Stacked towels. Suddenly the room feels like a grid.
“Balance these with cathedral-topped cabinet doors, Palladian windows, round drawer pulls and other curved elements.”
Introduce softness where the hard lines pile up. curved hardware. Arched mirrors. organic forms. Prevents the space from becoming sterile.
Mastering Space and Form
Space is not just empty air. This is a physical tool. The architects used empty spaces to create an asymmetrical balance. You can feel it right away in the bathroom. One wall piled with fixtures? The other side needs weight. Cabinet. art. window. Without it, the room feels like it’s leaning.
Shape includes mass and shape. Both can be used with simple visual adjustments.
Let’s take a look at the small bath with a standard tub-shower combo. It feels crowded enough. Now imagine a dark, patterned shower curtain covering an entire wall. The room will be even smaller. Add visual weight to an already crowded corner.
Swap it out
A clear liner makes the glass invisible. Glass doors do the same thing. The mass retreats to the far wall. The room breathes.
Color is also important. White cabinets look brighter than natural oak cabinets of exactly the same size. The oak absorbs light. White reflects it. If you have a small space, the lighter masses help the room expand. Dark masses pull the walls in. Choose wisely.
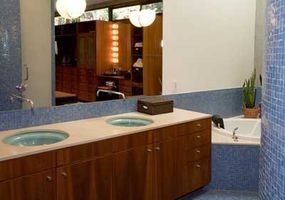
The biggest trick to making a small bathroom feel spacious is to control what you see when you walk in. Most people don’t like large objects at eye level that block their view of the room. If possible, move the heaviest fixtures away from the entrance.
Placing the shower or bathtub behind the door or on the other side of the wall makes the space feel significantly larger. Compare this to placing an same bulky tub next to the entrance. Your field of vision is full. It kills the flow.
The sink is different. a vanity is below eye level, so you can push it to the right near the door without taking up too much space.
Toilets is an exception. Although it is low profile, its presence is undeniable. If you want the toilet to be hidden from view, you need to install a screen. Use full-height or half-height partitions. Install it so that it breaks the line of sight from the entryway. The mass of the partition itself determines its location, not the toilet behind it.
What to do if you can’t move the wall
Let’s say you have a limited budget. Pipes cannot be moved. It is not possible to move the fixtures to a place on the wall where it is best suited visually. I’m stuck with my current layout.
Manipulate perception with color and line. Makes heavy objects less noticeable. Use lighter colors to recede. Use dark lines to emphasize or de-emphasize from certain areas. Create balance with visual weight rather than physical repositioning.
A mirror is your best friend. Use them abundantly. They are cheap, efficient and easy to install.
The mirrors deceive the eye. They bring in light. They create depth. They draw attention away from tight corners.
With a little effort with the mirror, you can get great results. Reflect something attractive. Maybe it’s the window. Maybe there is a piece of art on the opposite wall. You are not just reflecting the room. you are extending it. You are creating a focal point. You create a focal point that draws your eyes away from the clutter.
Where can I get more advice?
For more decorating ideas, check out these resources:
- Decorating a Bathroom
- Kids Bathroom Decorating Ideas
- Home Decorating Tips
About the author
Mary Wynn Ryan is the author of numerous interior design books such as The Ultimate Kitchen, The Ultimate Bathroom, Cottage Style, Fresh Country Style and Garden Style. She has written about home decor and interior design for several magazines and served as the Midwest editor for Design Times. She was also as director of consumer and retail marketing for Chicago’s Merchandise Mart Residential Design Center. She is the president of Winning Ways Marketing, an editorial and marketing consulting firm specializing in home design and interior design.